October 24, 2011

make a retro fall wreath

My boys and I are always dreaming up projects to do in our downtime, and they recently decided that we needed to make a fall wreath.  My oldest especially has been very intrigued with the idea that wreaths announce the seasons--a few weeks ago, placing a large apple that he made at school on the door, he announced, "It's apple picking time!"  They were emphatic that leaves should be the focus of this wreath.  I think that what they really wanted to do was take actual leaves and glue them onto a wreath (which could, theoretically, be beautiful, but when executed by 2- and 4-year-old boys, would look like the forest floor).  By the time we got to the craft store to pick out some supplies, they were fully on board with my dreams of handmade pompoms and wool felt.  The beauty of this project is that you can customize it in a million different ways.  It would be lovely to do this in monochromatic shades, for instance.  Or imagine adding some felted acorns or a beautiful felt bird.  I let go on color choices and let my boys make those decisions, but I still love the way it turned out.  The major plus of this project was that all of three of us worked on it together, and we could have used even more helping hands, so it's a nice full-family project.  And though the orangey hues are reminiscent of Halloween, this is transitional enough to last us right through Thanksgiving.

Materials
  • Pompom maker (available in the knitting section at the craft store--I bought two so both boys could work at the same time)
  • 12" wreath form
  • 2 spools grosgrain ribbon
  • 1 skein multi-colored yarn
  • 2 sheets wool felt
  • needle
  • hot glue gun
  • leaves from your yard and/or leaf template
Directions
  1. If you need a ribbon to hang your wreath, attach it to the wreath form now.  Use the grosgrain ribbon to wrap your entire wreath form.  We used a few different colors of ribbon.  Secure the end with a dab of hot glue.
  2. I loved making pompoms as a
    kid.  We are thinking up all sorts
    of uses for our new tool! 
  3. Collect leaves from your yard and trace them onto paper (or simply use the leaf template).  Using the template, cut the leaves out of wool felt.  We cut out nine walnut leaves and three oak leaves for our wreath.  Using the needle, create a simple vein with the yarn through each leaf.  No knots needed--the yarn will stay in place thanks to the thickness of the wool felt.
  4. Create your pompoms.  We made seven large pompoms.  This is great for developing those fine motor skills, too!
  5. Using the hot glue gun, attach the pompoms and leaves in groups around the wreath.
This is definitely an adults-required project, but we had so much fun with it.  I hope you do, too!

October 14, 2011

party planning for the sippy cup set

For his 4th birthday, my son had some very clear ideas about what he wanted--a dinosaur mystery party.  But when I asked him what that meant, he told me that it was a secret.  Of course, I wanted it to be perfect for him, so I got to work anyway.  We came up with a party plan that was totally dinosaur mystery-themed and kept everyone busy, happy, and well-fed.

We are firmly in the home-spun party camp.  I certainly have no problem with kids' parties that are hosted at a kid-friendly venue, and we love to attend them, but as a family, we prefer to host our celebrations at home.  Ultimately, we pulled together what I thought was a very fun and creative party that everyone on our guest list, from nine months to ninety years old, enjoyed. 

Herewith, some tips for hosting kids' parties that anyone can try:

I made this dino-themed invite,
along with matching thank you notes,
and printed it onto card stock for
mailing.
1. Set the tone with your invitations.  I have mentioned this before, but it is really helpful for your guests if you give some hints about the event and about your child with the invitation.  Especially as your child gets older, not everyone attending will know exactly what interests the birthday boy or girl has.  Guests like to know what to expect and how to dress, and they like to have a little direction when choosing a gift.  And keep the length of the party short and sweet for the little guys.  With this age group, less is definitely more!
A guest completes her dino mystery puzzle.
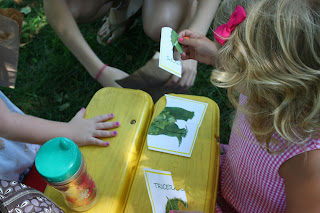
2. Keep 'em busy with stations.  It works at school, so why not at a birthday party?  We set up four themed stations: Dino Chomp, Dino Dig, Dino Match, and Dino Dash.  At each station, the kids had to complete a task to earn a puzzle piece (these were color-coded) that would solve their "dino mystery".  The tasks were simple but engaging, and the kids loved having a challenge to tackle.  Every child was occupied and engaged.  This took a lot of planning and work, but it paid off.  A friend of mine has since used the same approach at her son's party with a car theme, and it worked just as beautifully for her.

3.  Know what to have someone else take care of.  Originally, I'd planned to make dino-shaped sandwiches and the cake.  But as the stations took up more of my time, we decided to outsource the food.  We ordered pizzas, including specialty pizzas for the adults, and I bought a simple cake at the store and decorated it with a dinosaur play set that we rinsed off afterward.  Everything tasted great, the kids loved it, and it was one less thing for me to worry about. 

4.  Try a non-traditional favor.  There's no question that kids love favors.  But it's o.k. to think outside the goody bag.  I first realized this when a friend of mine gave an audio book to each child or sibling group at her son's party.  She had gotten a good deal and the cost per guest came out to the same as that of a traditional goody bag.  My children thought it was terrific.  For this party, I traded with my friend Becca of Bee Sweet Cookies, and she made an amazing personalized stegosaurus for every guest.  A major hit.

Overall, the most important thing is to go with the flow and really think about what your child and his or her friends will enjoy.  Happy kids always make a great party.

October 3, 2011

outdoor spaces

It has been a soggy, mercurial fall here in our neck of the woods, and I find myself longing for crisp, sunny fall days.  The fact that going outside requires a pair of wellies at the very least (though many days some sort of sea-worthy vessel would be more useful) makes me appreciate the outdoor space that we have at our disposal.  In my mind, some sort of outdoor space is essential to human wellness, whether it's your own yard, a nearby park, or even your landing on the fire escape.  Like plants, we need light and air to grow.

My home is situated on a not-too-huge and not-too-small corner lot, but I love the woods that our yard rolls into and the expansive feel that it has.  When we bought the place more than a few years back, the home had been neglected and was overgrown with scraggly shrubs and forlorn azaleas.  Over time, we have resurrected some things, moved other things, and done a lot of planting, pruning, and nurturing.  I am fortunate in that my father, mother-in-law, and grandmother-in-law, all avid gardeners, have taken an interest in our ongoing project and are always willing to lend a hand.  The resulting space is a rambling, wild space, something that brings us joy and comfort. 
Our outdoor space is nothing fancy, but some of our most peaceful, carefree, and balanced family time is spent there.  It has grown along with our family and I feel a deep connection to it. 

Do you have an outdoor space that inspires you?