June 26, 2011

shoes glorious shoes

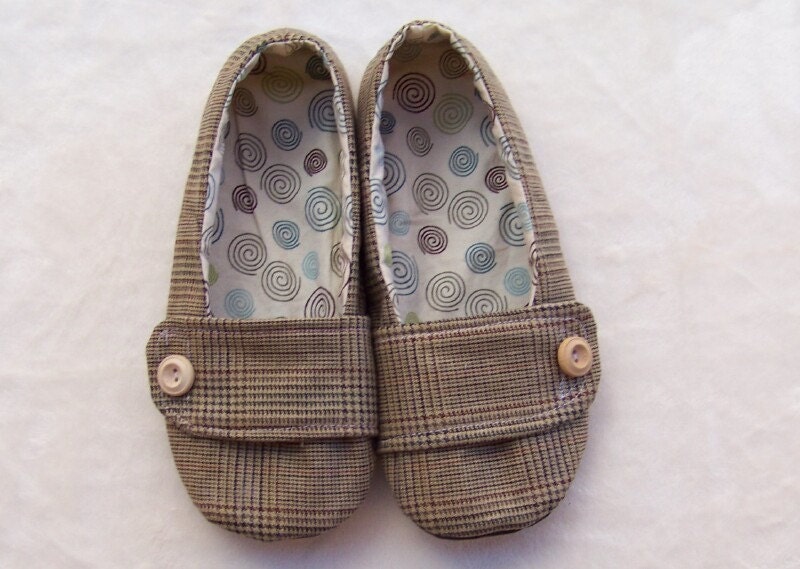
3 Women Shoe Patterns-DIY- Computer Download- Sizes 5-11


There is a certain type of sublime retail experience where you stumble upon something you didn't know you needed until the moment you behold it and then you just know you can't live without it.  You feel the flush of excitement and anticipation, that you are the only person who even knows about this thing that you have just discovered.  Must have been how Lewis and Clark felt.

That is how I felt when I found Shoeology.  This shop sells pdf patterns to make your own shoes.  This has been a crafty fantasy of mine since I was little and now it is going to come true!  Sure, I've made baby shoes from a very cute Amy Butler design, but this is a whole new ballgame.  My mind is racing with ideas for materials and finishing touches that I can add to my very own stable of handmade shoes and slippers.  Family and friends, clear out your Christmas stockings!

May 29, 2011

Roman holiday: a photo essay

My lovely sister recently took a trip to Rome, and she took some of her favorite Beeps' Peeps items with her.  She is a frequent inspiration for my designs as she balances work, family, and friends with style and grace.  I love to design with her and women like her in mind. 

Now, without further ado: Beeps' Peeps goes to Rome.


Over the past seven or eight months, I have been developing a line of handbags called the Lucia.  The name of the line comes from a Christmas tradition in my family, the making of Lucia buns, that began when my sister played Santa Lucia in a pageant.  More on that some other time--I'd love to pass along the recipe.


The Mama Lucia is a great roomy bag with a zipper and lots of pockets.  The fabric used here is Lilly Pulitzer's Scales and Tails.  It's a funky, atypical print from Lilly, a departure from her normal look.  By the way, her new print, Dark & Stormy, is spectacular.

Everyone in my family got shoe bags for Christmas--an adaptation of the bags that I made in the drawstring bag tutorial.  Meggan's was in this beautiful Riley Blake fabric.  It's always smart to carry an extra pair of shoes when you're in a walking city.  You never know when your shoes might start rubbing you the wrong way!  You don't want to cut your sightseeing short.


The travel tray is a new item at Beeps' Peeps that is exactly the type of thing that's nice to have on a trip--lightweight, super functional, and warms up the hotel room a little. 
Hope you enjoyed this postcard from Rome.  Ciao for now!

April 12, 2011

easy-to-make drawstring bags

We have a situation in my house: too many toy sets with lots of parts that are too easy to mix up with the other toy sets with lots of parts.  The answer to our dilemma?  Easy-to-make drawstring bags.  It's always nice to find a storage solution that's simple for the whole family to use, and the uses for these handy bags are certainly not limited to toys.  They are perfect for travel or the gym and can be used for makeup, crayons, cell phone chargers . . . anything that just needs a home.  These directions are for a 10" x 10" drawstring bag, but you can simply adjust the measurements to make a bag that is larger or smaller.

To make one 10"-square bag, you'll need:

1/3 yard quilting weight fabric (you will have enough fabric leftover for a second bag)
1 yard ribbon or cord
Sewing machine
Scissors
Iron
Straight Pins
Large Safety Pin

Directions:

1. Cut the fabric into a 12" x 22" rectangle. 

2. Fold in half, right side of the fabric out, and iron the crease.  Measure 2" down from the top and pin. 
 
3. Sew the two sides, leaving the 2" margin unsewn.

4. Trim the fabric around the two sewn sides to about 1/4"

5. Turn the bag inside out and press.  Sew the two sides again to enclose the seam (but still leave that 2" margin untouched).  Snip threads.

6. Now you will make the sleeve for the drawstring.  With the bag still turned inside-out, fold the edge of the 2" margin back and press.  Next, fold a 1/2" margin down all along the top and press.  Finally, fold the fabric down 1", press, and pin. 

7. Sew around the entire top of the bag.
8. Secure the safety pin to one end of the ribbon or cord and use it to thread the drawstring through the channel.

9.  Remove safety pin, tie the drawstring with a knot, and trim the ends.

10.  Fill your cute bag and enjoy!

April 8, 2011

blue and white delights

It seems that the blue and white color combination has enjoyed a nice little resurgence this season.  And why wouldn't it?  It hits so many marks--it can be nautical and fresh or classy and refined.  It walks the line of masculine and feminine beautifully, making it the perfect color scheme for any dual-gender household. 

Growing up, our good china was this Wedgewood pattern, featuring the blue and white design with little hits of orange and yellow.  I was over the moon when my mother passed it along to me.  At the beach, Blue Willow is the pattern of choice at both my parents' and my aunt's homes--it is a tradition that began long ago with a collection that lived in the family beach house before any of us did.  We even hd a storybook that told the tale associated with the pattern.  In our home, for large get-togethers, we always use the huge service of old A&P Currier & Ives dishware that I bought at an estate sale when we first moved into our house. 

My dining room/ workspace is decorated in the vein of Monet's dining room at Giverny, with blue and white and a healthy splash of yellow.  A large blue and white china chandelier anchors the space, and some of our best transferware is hung on the walls.  I store my work supplies in a large cupboard, originally used to store jam, that my husband's grandfather painted the perfect shade of blue decades ago.

The other day, I saw that a friend of mine had listed a lovely nautical dress and I went on a blue-and-white treasure hunt.  I found so many lovely things.  This truly is a timeless look that can be used in so many applications.

March 20, 2011

a little help


Like so many others, I am heartbroken by the recent events in Japan.  In the face of such tragedy, it is difficult to find a way to help, but I have been inspired by the efforts of those around me.  The students in the middle school where I teach have raised $868 to donate to the Red Cross.  Many of my fellow crafters have also jumped into action.  A Tennessee grandma (and EtsyKids member) immediately organized a collection of handmade items for children to be sent to Japan with Save the Children.  And Namoo and Tarabu of the Baltimore Etsy Street Team are auctioning off a package of pillows and cuddlies to benefit the victims of the earthquake.  I had an opportunity to see these items first-hand and they are exquisite!  I loved that Namoo used Japanese linens in her pillows and that Tarabu's cuddlies had little bento-box inserts in homage to the country they are seeking to help.

I have decided that I will follow suit.  In my etsy shop, I have two bags made of Japanese designer Etsuko Furuya's gorgeous Echino Patchwork.  One is a lovely pleated Lucia handbag and the other is a large shopper.  I will donate 100% of the proceeds from the sale of these two items to Doctors Without Borders, an organization that has sent medical teams to support the tsunami and earthquake response efforts in Japan.

Please consider purchasing one of these items--not only will you be the owner of a chic bag, you will be supporting a worthy organization in its relief efforts.  And every little bit truly does make a difference.

March 10, 2011

a cheerful treasury

Woke up to find that one of my invites had been included in this fresh and pretty treasury by The Bitsy Beau.  Yellow and gray are so nice in the early spring, when everything is just waking up and the color riot that is about to start is still biding its time.

March 9, 2011

gearing up

Just checking in quickly with an update on the party prep.  Like I said in my last post, we are keeping it very simple.  The nautical theme that was launched by the preppy whale invites has now morphed into a color scheme with a nod to the nautical in some of the details, including the kids' food, the favors, and the cupcake decorations.  The color scheme consists of a range of blues, white, and a nice kelly green.  Cal (the birthday boy's big brother) and I have been working on a banner that we'll use to decorate. 

We are using my Cricut to make the letters that we are using on both the banner and the cupcake flags.  I love the Cricut and thought I got a good deal on it, though every time I go to JoAnn's I have to avert my gaze from the ones they have on sale and tell myself they're not as nice as mine.  Cal really, really loves using the Cricut, and (with a LOT of supervision) it is easy enough for young children to operate. 

I'll post a tutorial on the banner and cupcake toppers when I have a spare moment.  It is simple but graphically pleasing, and I love the idea that the big bro is helping get ready for our little one's party--even if I do suspect that he's in it for some peripheral gifts.